How to Upload All Photos on Android to Maga
It's almost hither. On Tuesday, June 1—the day after Memorial Day—all your new Google Photos uploads will count against Google'south Information Cap. That excludes Pixel owners, but the balance of u.s. only take a few days left. Equally nosotros mentioned earlier, if you accept photos that y'all'd like to add to Google Photos without information technology counting against the storage limit, now is the time to deed.
Why would you desire to practise this? Because you get a free backup of your photos in print quality (assuming they were in the get-go place), and having all your pictures stashed in Google's cloud makes it easier to share photos with others.
Here's how to upload all your pictures to Google Photos before the new information cap hits.
Upload from your Android phone
 IDG
IDG Back up & sync options in Google Photos.
Many people have this enabled already, but in example yous haven't, the easiest way to get any pictures off your phone is to enableFill-in & Sync.
Start by opening Google Photos on your phone, and then tap your profile icon in the upper right corner.
Next, select Settings > Back up & sync, and then and make sure that the slider for Back up & sync is enabled every bit pictured here.
Adjacent, look at the section on the same screen entitled Upload size and make sure it says High quality (slightly reduced quality). If information technology does you're good to become.
If it doesn't, tap the menu item, and so select Loftier quality from the options on the next screen. That's it!
Upload from a PC
If y'all accept a agglomeration of photos that you want to upload to Google Photos from your PC, doing so is also a fairly piece of cake process. First, open your browser of choice and caput to Google Photos on the spider web at photos.google.com. If y'all're not signed in to your account then yous'll need to practise so.
Now, it'due south only a simple instance of clicking the upload icon (the upward facing arrow above a horizontal bracket) in the upper right corner of the Google Photos web app. Then select Computer from the carte du jour that appears.
 Ian Paul/IDG
 The problem here is that you can only upload photos from a single folder at a time. If you only have i binder's worth of images that's like shooting fish in a barrel enough. If you have multiple folders with hundreds of photos it'll be a serious pain, but fear non—we have a remedy for that in the side by side section.
To continue with a simple 1 folder solution, select the folder you lot want to upload images from, so concur down CTRL on your keyboard while selecting all the photos you want to move to Google's servers. (If you lot want all of the photos, you lot can just printingCTRL + A to select everything in the folder.) Now click Open.
Next, Google will inquire if you want to shop them in Original or High quality. Select the latter, since High quality images don't count against your Google storage cap (until June 1). Press Keep.
After the photos are uploaded you tin can add them to an album or just leave them as loose photos in your collection. You may as well need to check the metadata for each photo you've but upload to make sure that details such as the appointment are correct. That way, they will exist collected together if you lot ever search by yr. You can besides add a location to your images for like search capabilities. I thing you can't do, however, is change the file name once it's uploaded.
If you lot just accept a few photos that you want to add you can also just drag and drop them correct into the spider web app.
Backup & sync
For major upload jobs with hundreds of photos, you'll need Google's Backup & sync desktop utility. Once it's installed, open the app, click Get started, and sign in to your Google business relationship.
Now select Support photos and videos and select Next. And so you lot'll become to the crucial folio where yous can select folders to upload. By default, Google Photos wants to upload your entire pictures folder, and note that the High quality option is selected by default.
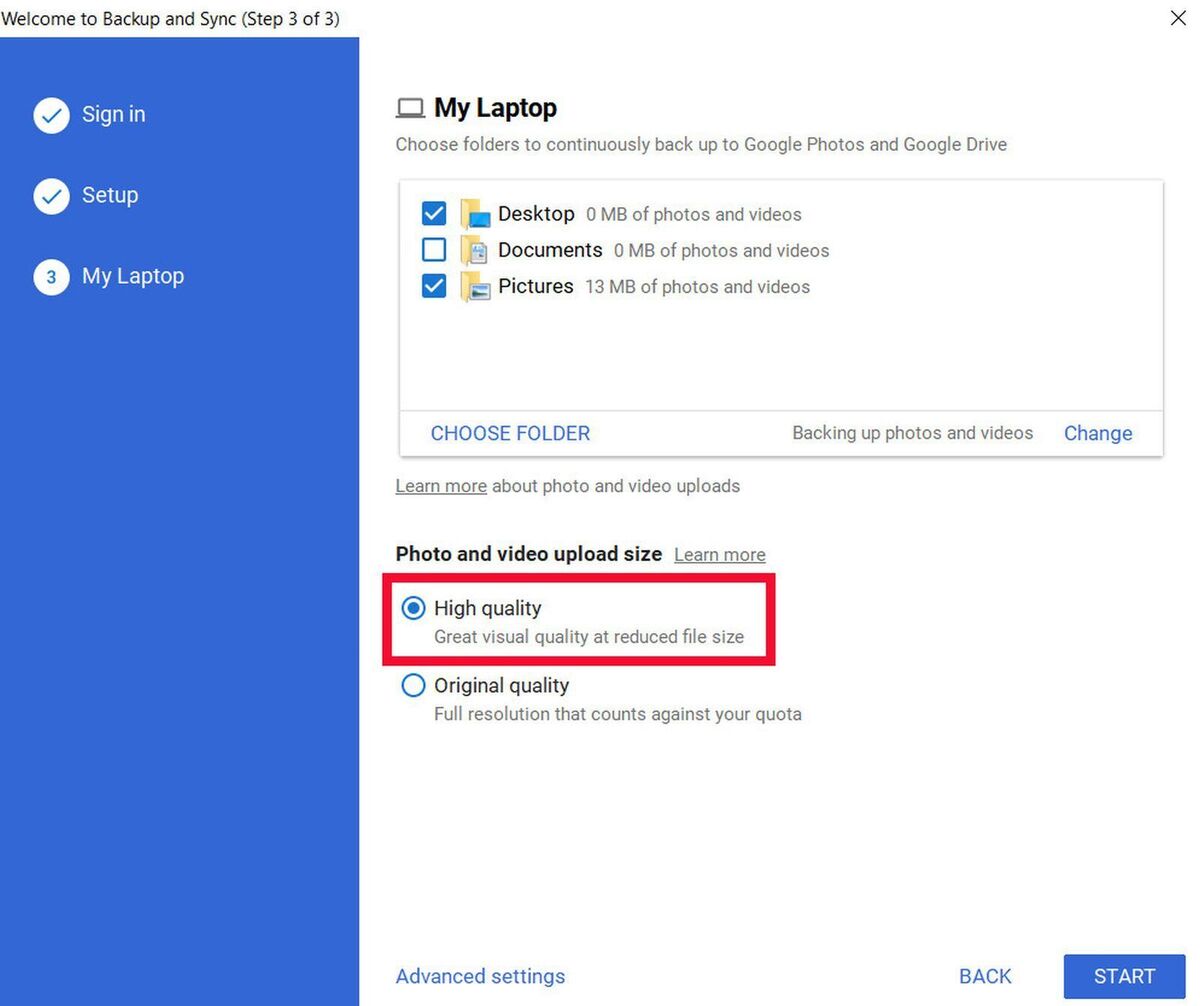 Ian Paul/IDG
 Exist certain to optionLoftier quality to stay under the cap.
If that suits you then merely click Offset and you lot're off to the races. Otherwise, click Choose Folder in that elevation box to select more locations for your photos. You can only select one folder at a time, but they will all get uploaded once you're done.
After that, Google'due south Backup and Sync service will upload all your selected photos in High quality. How long it takes depends on the number of photos y'all have and the speed of your Internet connection, of class. If you're uploading a lot of pictures to squeeze them in before Google's data cap hits, it's probably a skilful idea to let your PC run overnight. Once the upload is done, yet, y'all tin proceed these photos in Google's deject without impacting your storage cap that comes into outcome on June 1.
Source: https://www.pcworld.com/article/394601/how-to-upload-your-images-to-google-photos-now-to-avoid-the-june-1-data-cap.html
Post a Comment for "How to Upload All Photos on Android to Maga"